> ## Documentation Index
> Fetch the complete documentation index at: https://www.vozo.ai/docs/llms.txt
> Use this file to discover all available pages before exploring further.
# Get Started
> Learn how to create or edit speech using Voice Studio — whether starting from scratch or editing with existing audio/video.
## Start a Project
You can begin in two ways:
* **Create New Project**: Start from a blank project and generate speech from text.
* **Import Audio/Video**: Upload existing media to edit the speech, change voice, or add new voice-over.
## Configure Your Project
If you choose **Import Audio/Video**, you'll need to configure the following before processing begins:
* **Language Spoken**: Select the language spoken in your uploaded audio or video, or choose **Auto-Detect** to let the system identify it automatically.
* **Number of Speakers**: Choose the number of speakers or use **Auto-Detect** for automatic speaker separation. Providing the correct number improves accuracy.
Click **Continue** to proceed.
If you selected **Create New Project**, you can skip this step and begin generating speech directly from your script.
## Edit Speech
### Generate Speech
* In the Speech section, click **Add Segment**.
* Enter your text, choose a voice (from the left side of the text), and click the **Generate Speech** button.
 ### [Edit Speech](/edit_script_dub/edit_speech)
* Click on the sentence you want to edit.
* After editing, click **Generate Speech** to generate audio for that sentence.
### [Rewrite with AI Pilot](/edit_script_dub/ai_pilot)
* Click a sentence and choose **Rewrite with AI** in the toolbar.
* Provide a prompt and preview the result.
* To rewrite the entire script, use the **AI Pilot** button at the bottom right of the Speech section.
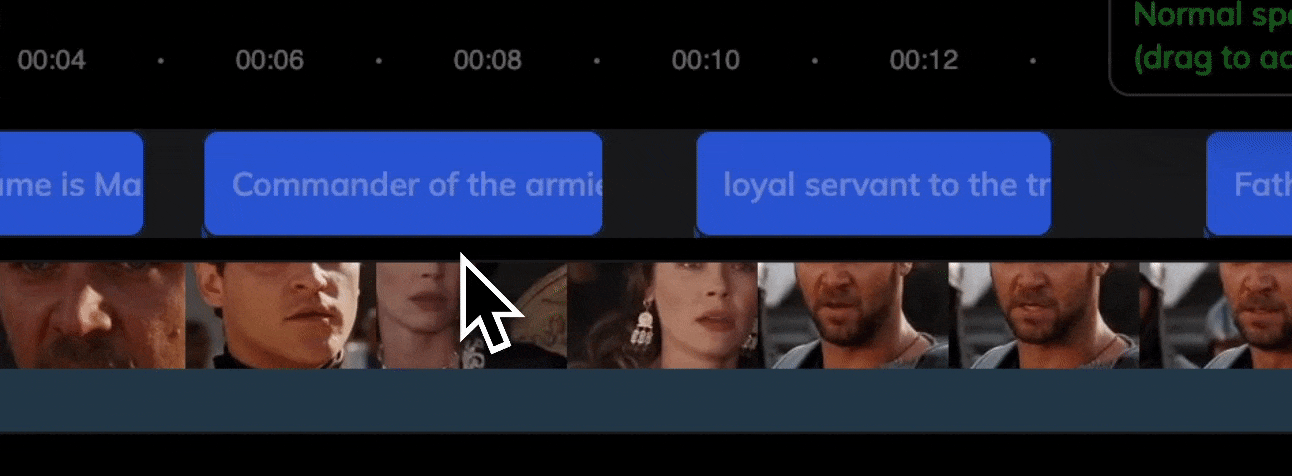
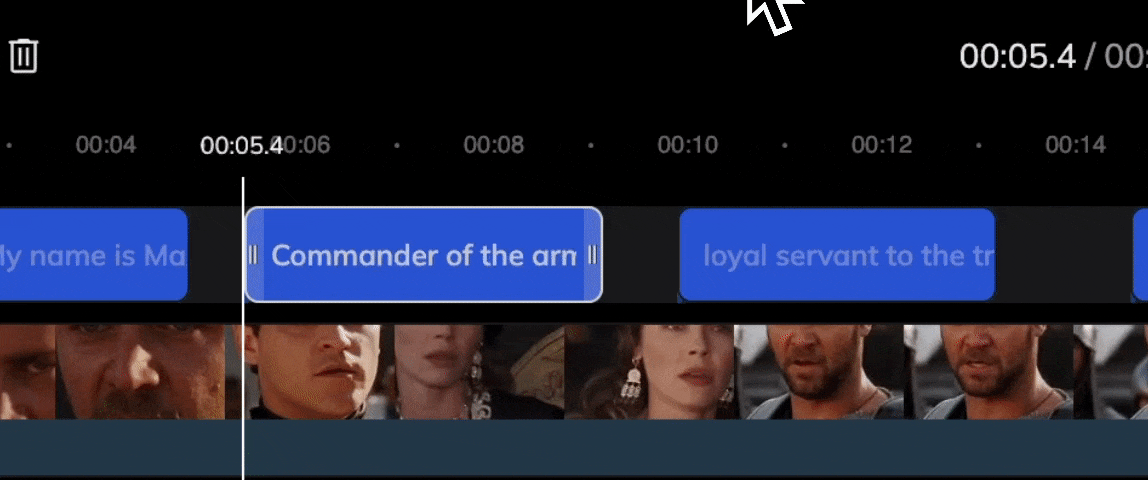
## Adjust Audio Timing and Speed
Use the timeline at the bottom to fine-tune audio playback.
### Adjust Timing
Drag the speech audio block left or right to shift its position.
### [Edit Speech](/edit_script_dub/edit_speech)
* Click on the sentence you want to edit.
* After editing, click **Generate Speech** to generate audio for that sentence.
### [Rewrite with AI Pilot](/edit_script_dub/ai_pilot)
* Click a sentence and choose **Rewrite with AI** in the toolbar.
* Provide a prompt and preview the result.
* To rewrite the entire script, use the **AI Pilot** button at the bottom right of the Speech section.
## Adjust Audio Timing and Speed
Use the timeline at the bottom to fine-tune audio playback.
### Adjust Timing
Drag the speech audio block left or right to shift its position.
 ### Adjust Speed
Hover over either edge of a speech block to reveal a handle. Drag to stretch or compress for speed control.
### Adjust Speed
Hover over either edge of a speech block to reveal a handle. Drag to stretch or compress for speed control.
 ## Lip Sync
After generating speech, you can sync lip movements with the new audio.
Lip Sync is only available for projects with uploaded **video**.
1. Click the **Lip Sync** tab on the left.
2. Refer to [Get Started with Lip Sync](/lipsync/get_started) for configuration.
3. Start lip sync to automatically match mouth movement with the updated voice.
## Export and Download
Once you're satisfied with your edits:
* Click **Export** at the top-right corner.
* After rendering is complete, click **Download** to get your final audio or video.
## FAQ
Please refer to the [Points Usage for AI Tools](/common/tools-points-rules) for detailed pricing rules.
## Lip Sync
After generating speech, you can sync lip movements with the new audio.
Lip Sync is only available for projects with uploaded **video**.
1. Click the **Lip Sync** tab on the left.
2. Refer to [Get Started with Lip Sync](/lipsync/get_started) for configuration.
3. Start lip sync to automatically match mouth movement with the updated voice.
## Export and Download
Once you're satisfied with your edits:
* Click **Export** at the top-right corner.
* After rendering is complete, click **Download** to get your final audio or video.
## FAQ
Please refer to the [Points Usage for AI Tools](/common/tools-points-rules) for detailed pricing rules.