Show Original Video & Mark Speaker
Toggle the Check & Edit Lip Sync switch at the bottom-left corner of the editor to view a side-by-side comparison: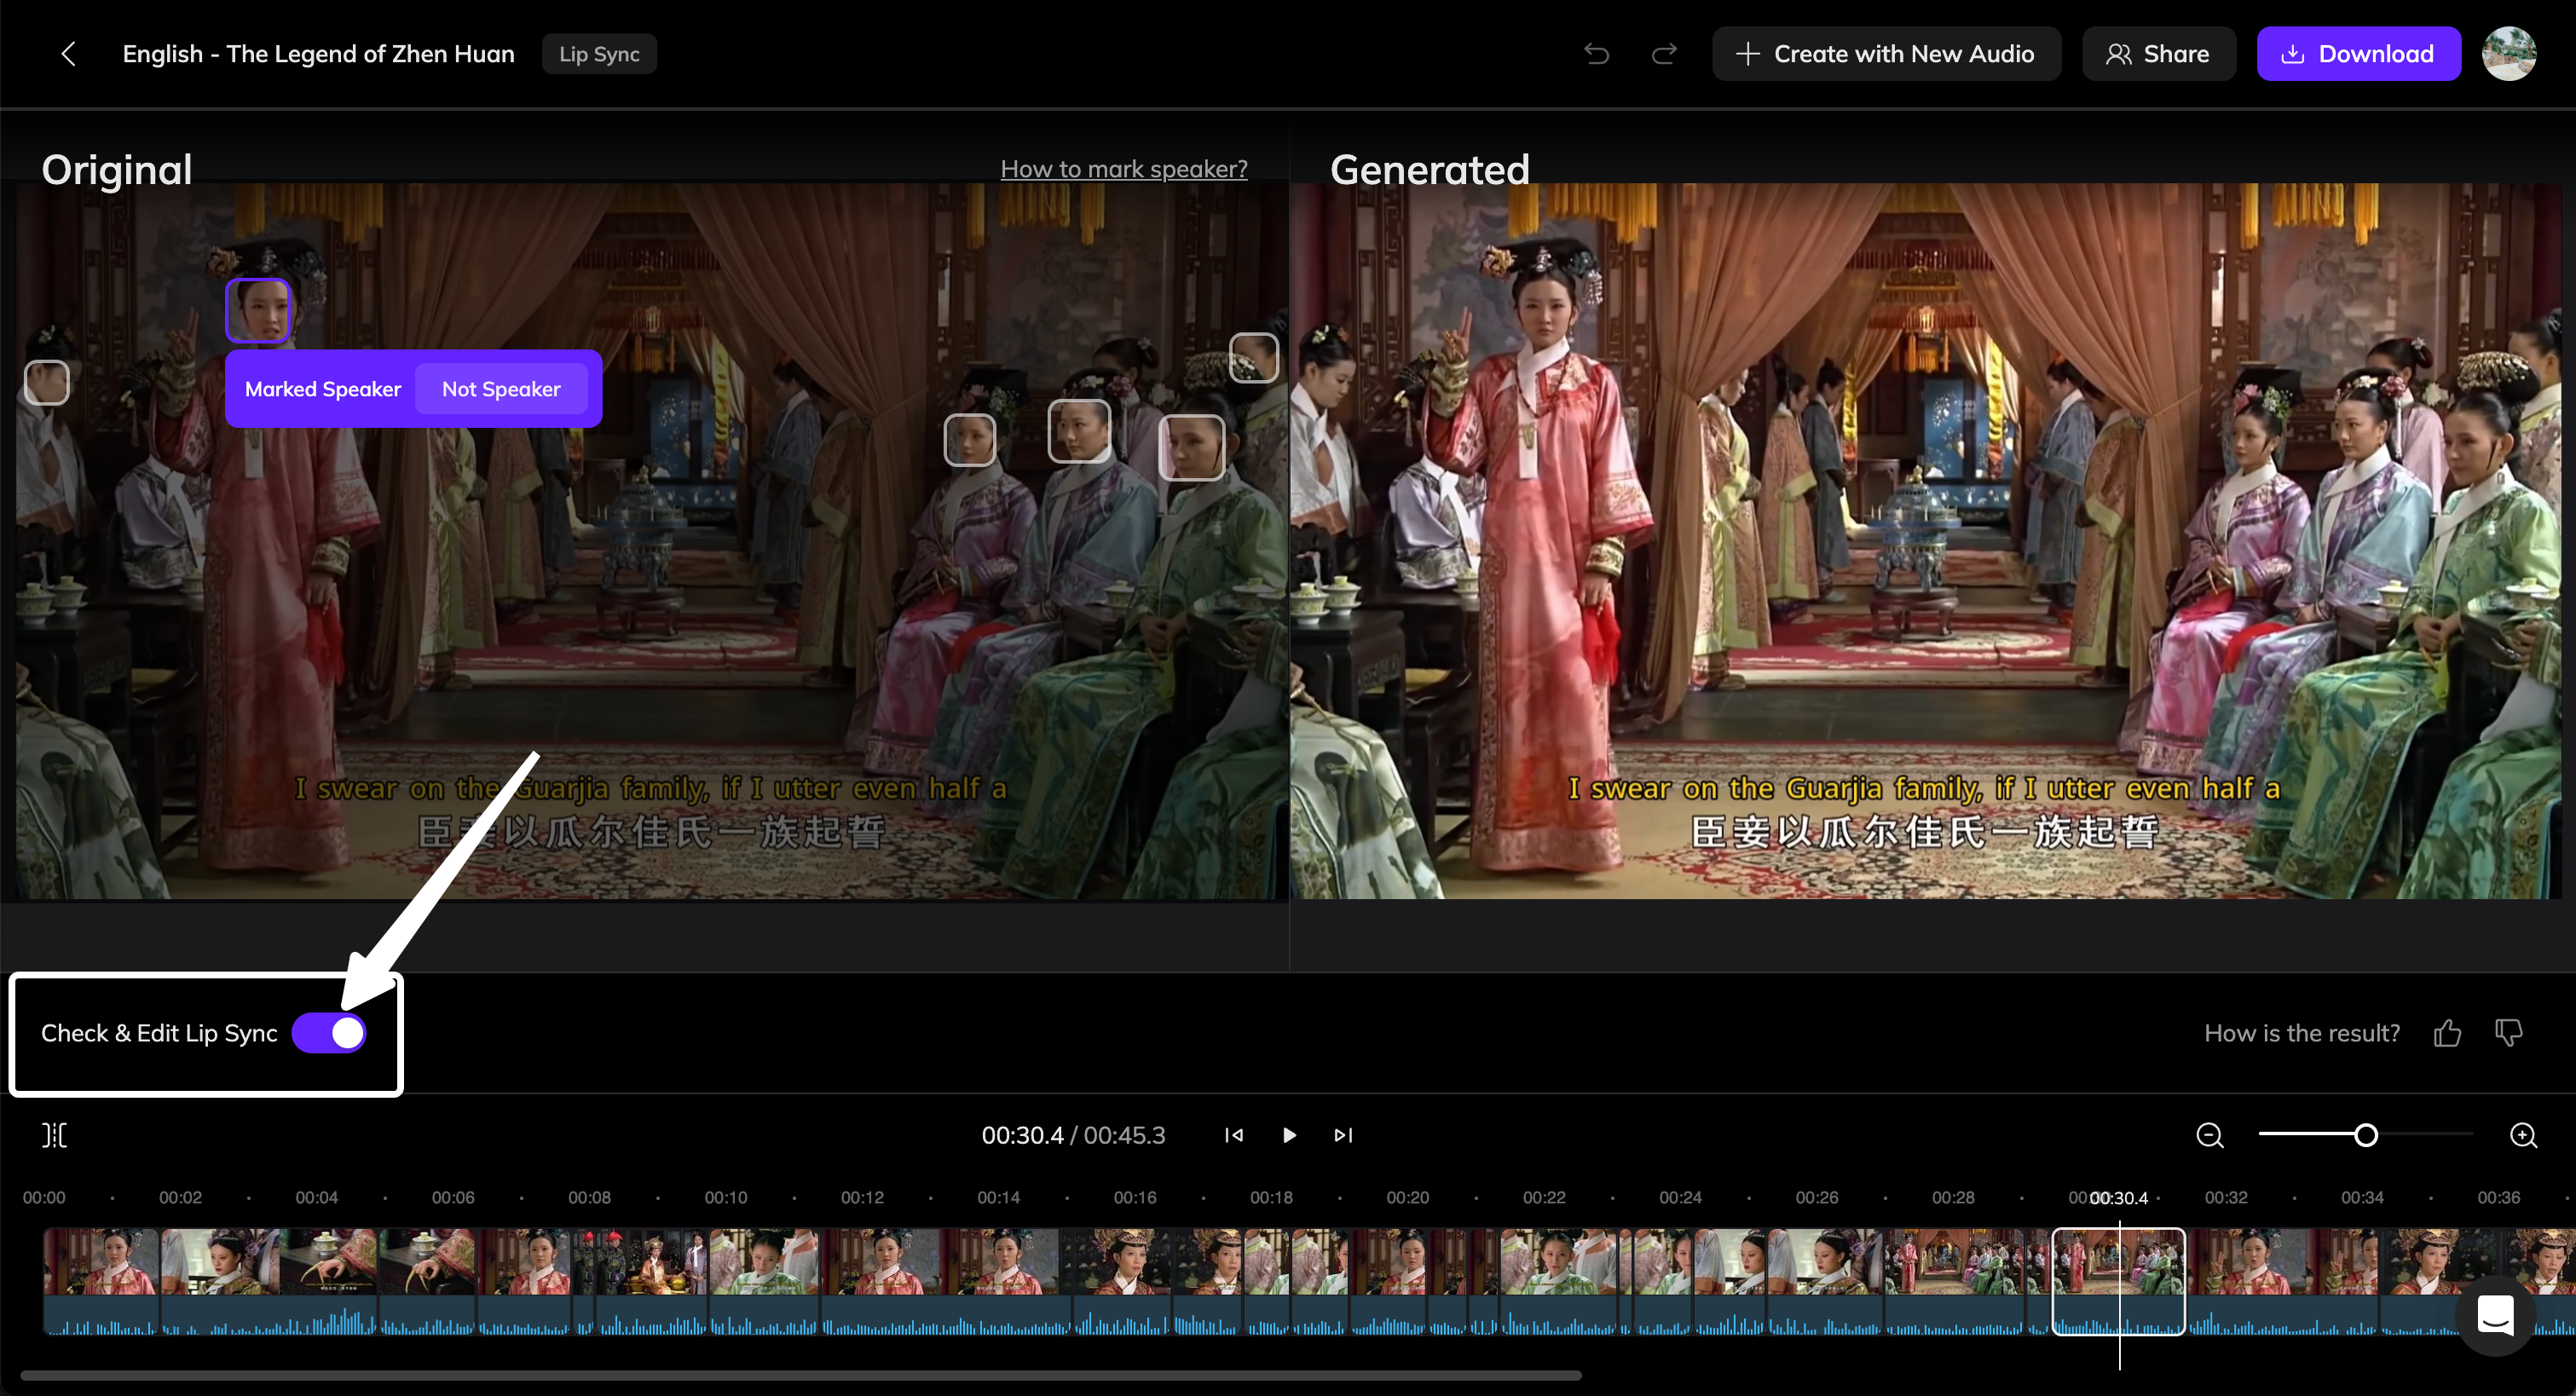
- Left: the original video
- Right: the generated video
- Marked Speaker — this face is identified as the current speaker and has been synced to the audio.
- Not Speaker — this face is not identified as the speaker and remains in its original state without lip sync.
How to Mark the Speaker
Correct Speaker Markings
- If the speaking face was not correctly recognized as the speaker, click Mark as Speaker button.
- If no one in the frame is actually speaking (for example, during a voiceover or narration), click Not Speaker on the incorrectly marked face.
Mark Specific Time Segments
Vozo automatically splits your video into multiple timeline clips.If the part you want to edit isn’t already separated, you can split it manually:

Common Scenarios and Solutions
Lip Sync applied to the wrong face
Lip Sync applied to the wrong face
When multiple faces appear in a scene, Vozo might apply lip sync to the wrong one.How to fix:
- In the original video preview, click the correct face and choose Mark as Speaker. The incorrect face will automatically be unmarked.
- Click Regenerate x Edited Clips to update the result.
Lip Sync triggered during voiceover segments
Lip Sync triggered during voiceover segments
If the audio comes from an off-screen narrator or background voice, the system may still apply lip sync to a visible face.How to fix:
- Select the synced face and click Not Speaker.
- Click Regenerate x Edited Clips to remove lip sync and restore the original mouth motion.
Lip Sync overlaps with obstructions (e.g., microphones or hands)
Lip Sync overlaps with obstructions (e.g., microphones or hands)
Sometimes, lip sync can make the mouth appear over objects like microphones or hands.How to fix:
- Click Split to isolate that segment on the timeline.
- Select the segment and click Not Speaker.
- Click Regenerate x Edited Clips to remove lip sync.
Unnatural expressions during silence or pauses
Unnatural expressions during silence or pauses
Lip sync may generate unwanted mouth movement when the speaker is silent.How to fix:
- Click Split to isolate the part where the issue occurs.
- Click Not Speaker for the face in that segment.
- Click Regenerate x Edited Clips to apply the update.
Face looks unnatural during fade transitions
Face looks unnatural during fade transitions
During fade-in or fade-out transitions, lip sync may create distorted facial effects.How to fix:
- Click Split to separate the transition from the rest of the video.
- Click Not Speaker for the face in that segment.
- Click Regenerate x Edited Clips to finalize.